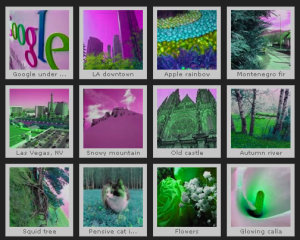
Flash free gallery is an image gallery system that is made to make an alternative to all the flashy foto galleries made using Macromedia Flash.It is an attempt to create a good looking gallery with the use of JavaScript, CSS, PHP, and the AJAX .The gallery which is made bt Ajax is very nice and it is faster than the Flash galary. Switch between categories and load up images without having to refresh the page.
You can create easily a custom image galary with a cool slide show for your blog or website with the help of a easy and free tool called Ajax in a few simple steps.
You just have to drag&drop your photos into Ajax Photo Gallery window, select the style of thumbnails and the overlay window and add the HTML embed code on your website or blog.
No javascript,css,html coding, no image editing, just a click to get your gallery ready. A few clicks and you’ll see a stylish photo gallery with beautifull lightbox and zoom effects on your own website or blog!
The necessary steps are as follows
1> Adding images to gallery : you can add immages from folder by browsing the location or from Flickr option , Otherwise you can drag your picture to the vissual light box window.
2> Adding Caption : After adding the immages you can add comments or caption for the foto.You’re able to use some common html tags (such as: <b>, <i>, <u>, <span>, <a>, <img> and so on..) inside your caption to highlight some text or add links.
3> Editing capabilities : In this website gallery software you can easily rotate your pictures using “Rotate Left” and “Rotate Right” buttons. Right click on the picture and select “Edit images..” item to open the selected picture in your default graph editor. You can adjust the color of pictures, as well as fix red-eye and crop out unwanted parts of an image.
4> Gallery properties : Change the name of your album, the size and quality of your pictures with Ajax Photo Gallery. From the Gallery menu, select Properties or use “Edit Gallery Properties” button on the toolbar.
5> Publishing the photo gallery : When you are ready to publish your website photo album online or to a local drive for testing you should go to “Gallery/Publish Gallery”. Select the publishing method – publish to folder or publish to FTP server. publish to folder. To select a local location on your hard drive, just click the Browse folders button and choose a location. Then click Ok. You can also set “Open web page after publishing” option. publish to FTP server. The FTP Location Manager window enables you to define a number of connections for use when uploading your web site album to an FTP.
6> Save your photo gallery as project file : When you exit Ajax Photo Gallery application, you’ll be asked if you want to save your project. The project consists of the pictures you choose to put on your web photo gallery and all your settings. It’s a good idea to save the project, because that will allow you to change the project in case you decide to do something different with future galleries. So click Yes, then enter a name for your project. To select the location of your project, just click the Browse folders button and choose a different location. Then click Save.
7> Add Visual LightBox inside your own page : Visual LightBox generates a special code. You can paste it in any place on your page whereyou want to add image gallery.
Export your LightBox gallery using Visual LightBox app in any test folder on a local drive.
Open the generated index.html file in any text editor.
Copy all code for Visual LightBox from the HEAD and BODY tags and paste it on your page in the HEAD tag and in the place where you want to have a gallery


